UCOP Cascade Help
Category item blocks
Applicable to: category/list pages | Skill level: intermediate
Goal: Create a new category item block for use on a category page.
Category items are created especially for use on category/list pages. Most often, they are used to link to external resources — files or pages that reside outside of Cascade. (But they can also be simple text blocks).
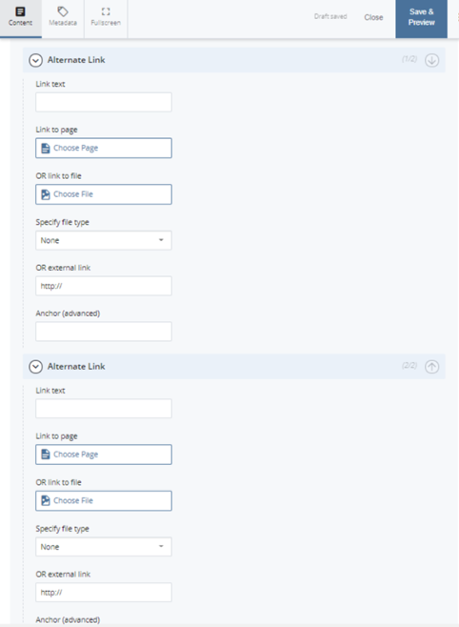
Typically, only the title of a category item block is linked, but you can choose to add two additional links using the Alternate Link fields (for a total of up to three links).
Unlike some other kinds of blocks (link lists, flex blocks and contact blocks), category item blocks live inside the folder containing the category/list page (called "index") on which you want your block to display. (View details of adding a category item block to a category page).
Steps for creating a new category item block
-
Navigate to the _blocks folder in your Cascade asset tree. Click Add Content in the upper left of your screen. Click Blocks, then Category Item.
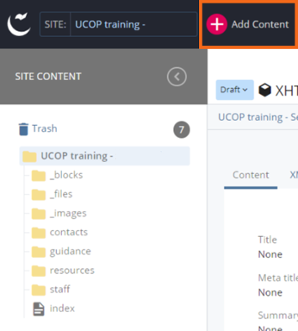
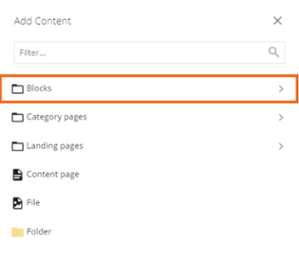
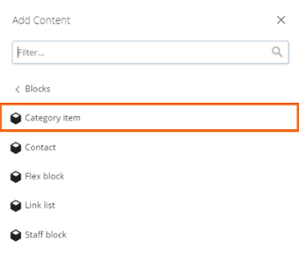
-
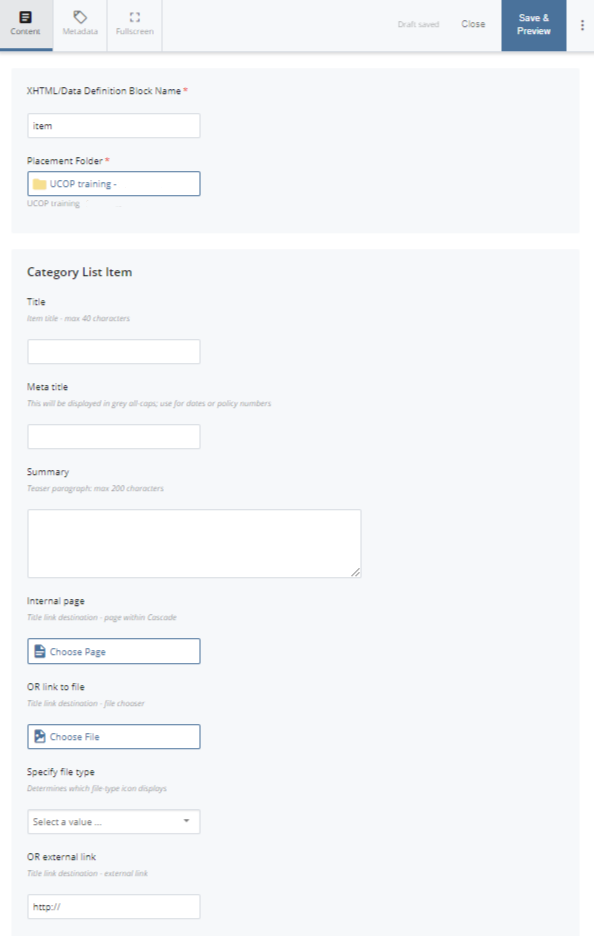
Assign a descriptive XHTML/Data Definition Block Name to the block, so that you'll know what it is just by looking at the name.
-
Confirm that the Placement Folder is the folder containing the category/list page (called "index") on which you want your block to display.
-
Complete the appropriate fields.
You should always try to provide a brief Summary, so that users have some idea of what they're getting when they click.
To add your Title link, you have three choices: Internal Page, link to file, or external link. You may only choose one option. For files, select a file type to display a file type icon (e.g.,
 ).
).
-
If you need additional links, complete the Alternate Link field(s). These are especially useful for materials available in multiple formats (e.g., a pdf and a Word doc).
To add your Alternate link(s), you have three choices: Internal page, link to file, or external link. You may only choose one option per link. For files, select a file type to display a file type icon (e.g.,
 ).
).
-
Save & Preview.
-
Submit, then select Submit or Check Content & Submit to perform spelling and accessibility checks.
