
UCOP Cascade Help
Link list blocks
Applicable to: content pages | Skill level: easy
Goal: Create a new link list block for use in the right-side column of a content page.
Link list blocks are used in the right-side column of content pages, primarily for navigational purposes — to help users find related resources or go back to where they came from. As the name indicates, they are formatted as a bulleted list of links. The title of the block can also be a link.
Link list blocks live in the _blocks folder, usually with a folder called "link-lists."
Steps for creating a new link list block
-
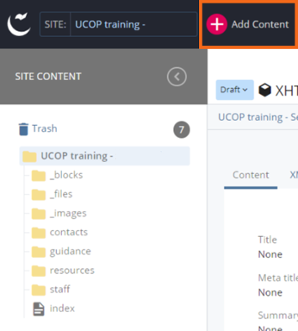
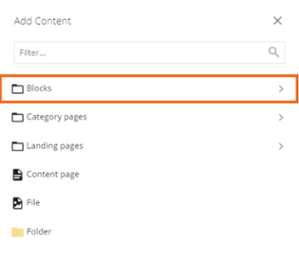
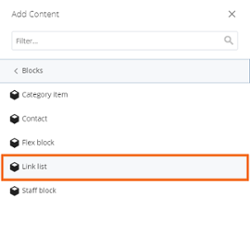
Navigate to the _blocks folder in your Cascade asset tree, then select the link-lists folder (if your site has one). Click Add Content in the upper left of your screen. Select Blocks and then Link list.
-
Confirm that the Placement Folder is link-lists. (If your site doesn't have a link-lists folder, the Placement Folder can be _blocks).
-
Give the block a Title.
Cascade will convert the Title you provide into an asset name for the Link list block when you submit. Please note: Because link list blocks tend to have generic titles like "See also" or "Related resources," you may want to rename your link list block after you create it using Move/Rename. Recommended practice is to include the name of the page or section in which the link list block is used, e.g., "best-practices-related-resources."
-
If you would like for the title of your block to be a hyperlink, use the Title Link field. This is optional.
-
Build your links.
You must provide Link text; this is the text that will display as a hyperlink in your link list block.
To add your link, you have three choices: Link destination (internal), File, or external link. You may only choose one option for each list item.
Use the plus sign (
 ) to add more links to your list. See more information about linking.
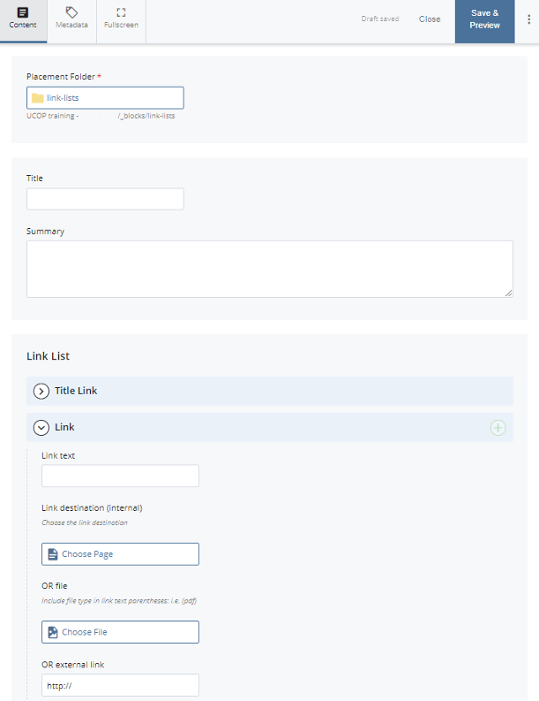
-
Save & Preview.
-
Submit, then select Submit or Check Content & Submit to perform spelling and accessibility checks.